 Canada
  United Kingdom
  United States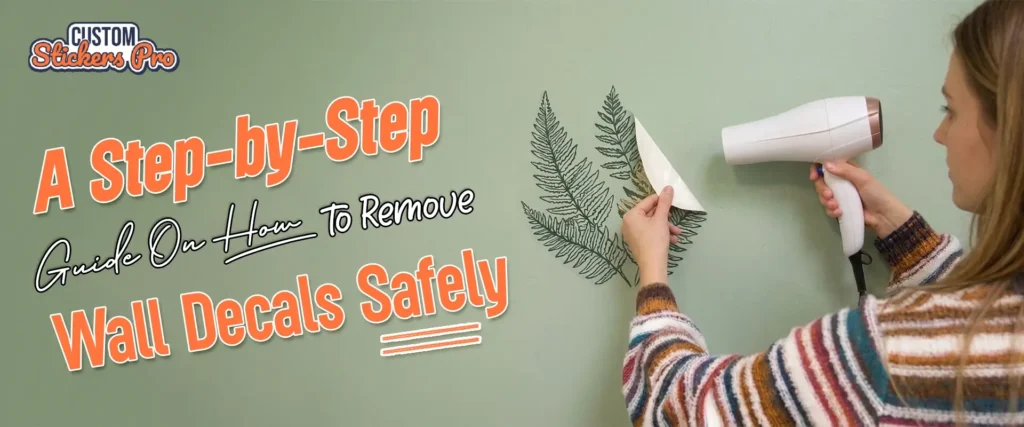
Wall decals are temporary decor solutions that are used for both personal and professional purposes. They are easy to paste but when it comes to removing them can be a bit tricky. The reason behind this is that they can leave a sticky residue if they are not removed properly. This can also damage the wall on which they were pasted and give an unappealing look. So, the question then arises: how to remove decals from a wall? There are different methods to achieve this target with minimal damage. Read further to find them out:
Pre-Removal Prep: Identifying Your Wall and Paint Type
You need to be well aware of what you are getting into before you pick up the tools for sticker removal. There are different types of walls with diverse textures which require precise handling to make sure they are not damaged in the process of wall decals removal. You need to know the following details before choosing an appropriate method:
Why Paint Age And Type Matter
The type of paint applied to the wall with a decal must be taken into consideration. These include:
- Matte Paint: This is a porous pigment that absorbs liquid very quickly. The oil from the solvents is absorbed very quickly which can permanently leave dark stains.
- Satin or Glossy Paint: They have a hard and protective outer layer so they can handle heat much better. But if the wall was dirty or not primed, the paint can fall off in pieces when the decals are pulled.
- Fresh paint: It takes weeks for the paint to chemically harden. Paint cured for less than 4-6 weeks will almost always peel with a decal.
The 30 Second Inconspicuous Test
You can perform a diagnostic test on a competitively hidden area before dealing with the main graphic that is to be removed. This can prevent visible damage in case things do not work out. Pick a Hidden Spot on the wall that is not clearly visible like the part that is hidden behind the furniture. Test the heat after this by blowing a hairdryer six inches away on medium heat for a few seconds to check that the paint does not blister or soften. Rub the warm paint gently with a cloth to look for any damage. Do not scrape and use minimal heat if the color rubs off.
Essential Tools With Materials Checklist
You can achieve flawless decal removal if you have the right materials. There are different factors that you need to be mindful of. These include:
| Category | Items | Strict Restrictions |
| Heat Sources |
|
Never use industrial heat guns. Do not hold heat in one spot |
| Lifting Tools |
|
No metal putty knives and metal utility blades |
| Cleaning Supplies |
|
Avoid abrasive steel wool. Do not use rough scrubbing pads |
| Solvents and Cleaners |
|
Don’t use harsh paint thinners like acetone. |
Step-By-Step Decal Removal Process
The process of removing custom decals from the wall has been broken down into simpler steps to help you understand the process. This will equip you with enough knowledge to easily deal with all the steps. The detailed process is explained as follows:
Step 1: Environmental Preparation
Make sure that the place where you are working is neat so that surrounding objects are not affected by the process. It is important to place a cloth or towel under the wall on which the decal is pasted after you clear the space. This will help in protecting your flooring from getting dirty when the vinyl pieces fall off upon removal.
Step 2: The Dry Heat Method
Are you still wondering how to remove decal from wall? Well, you are about to get the answer. Use a heat source like a hair dryer to loosen the adhesive bonds of the decals. Keep the nozzle around 6 to 8 inches away from the decal and set it to a medium heat setting. Wave the hairdryer around the decal for about a few seconds in order to soften the glue. Be mindful of the fact that you cannot keep the dryer stationary in one place. Move it slightly or else heat can discolor your paint.
Step 3: Steam Method
A clothing steamer can also be used for extra sticky vinyl decals. The steamer is filled with water and heated after which it is hovered over the decal from some distance. It is the combination of moisture and heat that helps loosen the tight bonds of adhesive. Preferably keep a cloth or towel in your hand to prevent the hot water from running down the wall.
Step 4: Executing The Safe Edge Lift
Place your plastic card parallel to the wall decals after its surroundings have warmed up. Keep your tool flat against the surface to prevent scratching. Try not to push vertically into the wall as angled pressure can puncture the drywall paper core beneath the paint.
Step 5: The Peel Technique
Never pull the decal straight at a 90-degree angle because it can put maximum stress on the paint layer. The best method is to fold the loose corners and pull the decal slowly to the opposite side at 180 degrees. Hold your dryer at a distance when you are peeling to soften the glue.
Ways To Get Rid Of Adhesive Residue
Want to know how to remove wall decals without damaging paint? There are always chances that even after careful peeling, some stickiness remains. The good thing is that they can be removed with some effort. You can go for any of the following methods for decal removal:
The Soap And Water Scrub
This method is best for square decals with water based adhesives. Prepare a mixture of mild soap and water first. Dip a cloth in it to soak it in the mixture. Move that cloth in a circular motion over the sticky area. This will produce friction that will roll the glue into small balls which can be wiped off easily.
Isopropyl Alcohol
Dab a small amount of liquid onto a clean ball then press it firmly to let the chemical bonds dissolve. It is important that you use this method carefully on matte surfaces because the liquid can penetrate the porous surface easily and leave full spots on the wall.
Baking Soda And Coconut Oil Paste
Remove the custom decals from the wall using ingredients that are easily available. Just form a thick paste by mixing the baking soda with virgin coconut oil. This can be directly apply to the leftover glue on the wall to remove it. The mixture always works because of its combo as oil breaks down the stickiness and soda is a paint safe abrasive to scrub the film.
The Tape-Lift Method
This is the best method for freshly pull decals from the wall by using no liquid. Keep the sticky side of the tape outside and wrap it around the finger. All you need to do is press the tape on the wall so that it comes into contact with glue. Pull it away quickly then remove the residue.
Commercial Solvents
You need a strong cleaner when the decal has been place for a very long time. The common options for cleaners include GOO Gone or WD-40. It is better to spray these solvents on a cloth instead of directly applying them to the paint because it can leave lasting stains. Wash the spot with soapy water after thorough cleaning to prevent the chemical from weakening the paint.
Troubleshooting Special Scenarios
Different oil types and old rectangular decals bring a set of exceptional challenges. But the good thing is that they can be navigate. These solutions come in handy:
Decals On Textured Walls
There are a lot of bumps in the walls with a unique texture. The glue drops down in these spots which cannot be remove through a flat tool. A longer exposure to heat can help solve this problem. You can also dip your toothbrush in soapy water and access the bumps easily to remove the glue.
Removing Old Decals
It is a common query on how to remove wall stickers that are placed outside. Sunlight and air can dry the decals and make them fragile. They can easily break when you pull them out. In such cases, use a steamer instead of a hair dryer to loosen the decal. The steam adds moisture to the decal and helps in coming off easily.
Preserving Decals For Future Use
You can save up your decals to use them at another place or time. The problem is that there is a chance that decals curl up and stick to themselves. Put the decals on a clean sheet after you have pulled them. This will prevent it from sticking to other objects or getting dirty with time.
Conclusion
Now you are aware of how to remove wall decals. Go through this guide thoroughly and choose the appropriate removal method based on where your decal is placed and how long it has been since it was pasted. This will not only help you clear your walls but also keep the decals in their original condition for reuse. You can also get answers to other queries by contacting Custom Stickers Pro. We are the largest wholesale supplier of customized decals in the USA. Our company is a trusted option because we never compromise on the quality and offer free assistance at all times. Give us a call now!