Stickers are one of the most innovative ways that can be used for the promotion of brands. They have an alluring look that increases the visual appeal of stickers. One can use these stickers for a wide variety of purposes but to achieve their full potential it is important that they are made with precision. Keep on reading to find out how to make the perfect custom stickers for personal as well as professional uses.
What Are Stickers?
A sticker is a printed material that has an adhesive back that helps it attach to different surfaces. These are compact and convenient marketing tools that can be used in almost all industries because of their versatile nature. They are mostly used for the following purposes:
- Product information
- Decoration
- Branding
- Event marketing
- Shipping labels
- Promotion
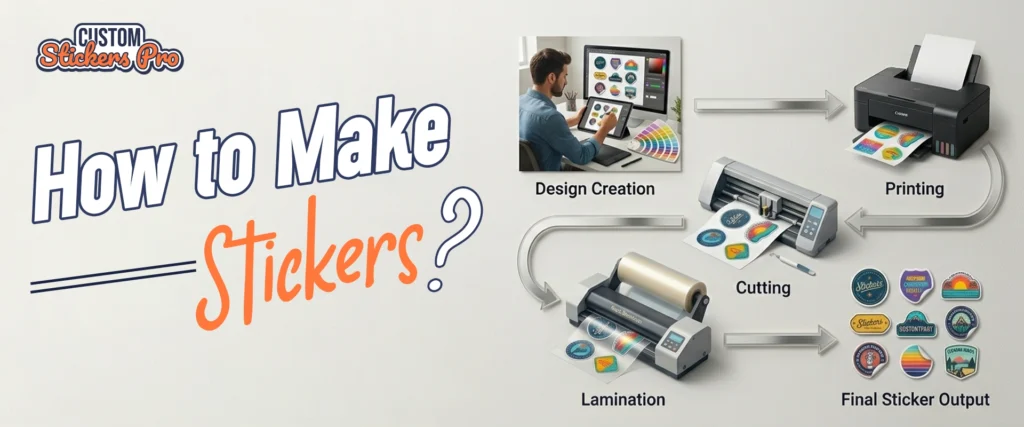
Step 1: Plan Your Sticker Design
How to make personal stickers? This is a common question that repeatedly comes to your mind and then makes way into your search history. The first thing you need to decide is the design of the custom stickers that aligns with your vision. This mainly depends on the purpose you want to achieve. The entire look is then designed on this basis to fulfill your goal.
Important Design Elements
There are some elements that need to be kept in consideration. They are important to ensure the functionality as well as the appearance is up to the mark. One has to ensure that they make a deliberate effort while selecting the following aspects:
Choose the Right Size and Shape
The shape of the sticker impacts its appearance greatly. It also needs to be seen that the dimensions of the surfaces on which these stickers are to be attached. Die-cut stickers are also a famous option because they follow the same outline as the artwork. Some of the most popular shapes include:
- Round stickers
- Oval stickers
- Square stickers
- Rectangle stickers
- Custom shapes
Use High-Quality Graphics
Images with low-resolution can make stickers appear blurry after printing. You must use the artwork with at least 300 DPI that gives professional-quality results. This ensures that the design of the stickers is vivid and clear.
Keep Text Readable
How to make a sticker informative without crowding the text so that it becomes difficult to read. Try to avoid very small point thickness and quirky fonts that take effort to find out what is written, because it defeats the purpose of clear communication of the message you want to give.
Maintain Visual Balance
Try not to overcrowd your stickers with designs and taglines because it can create a feeling of overwhelming. Simpler designs look more professional with their minimalist feel as they can communicate clearly through visuals.
Best Software for Sticker Design
There are several tools that can be used. Professional designers often prefer vector-based software because it allows designs to scale . The famous tools include:
- Adobe Illustrator
- Canva
- Photoshop
- Procreate
Step 2: Select the Right Sticker Material
The strength of the stickers must be at a level that they can sustain themselves without losing their structure. Their durability depends on the type of material you pick as the base for them. Some of the sticker types differing with respect to their material include:
Vinyl Stickers
Choose vinyl if you want your die-cut stickers to attach to flexible surfaces. They can be used in outdoor environments because of their moisture-resistant properties. These stickers can be removed from smooth surfaces like glass without leaving a sticky residue.
Paper Stickers
Eco-aware brands and individuals can choose stickers made of Kraft paper because of their ability to degrade naturally. They are derived from wood pulp and can also be recycled after some time. It is best that they are used in indoor settings so that their corners do not fold in humid environments.
Transparent Stickers
Make your own sticker with a see-through background to give a
minimal appearance. These clear die cut stickers are commonly used on glass surfaces and product packaging to give a neat look.
Holographic Stickers
These stickers are made of a metallized PET layer for premium products. Their reflective surfaces that change colors under light to create an exciting vibe
Choose the Right Finish
How to make custom stickers instantly attractive? Get them coated to enhance their visual appeal and communicate the quality of your stickers. You can select the perfect final touches to give them a personal touch.
| Finish | Characteristics |
| Matte Finish |
|
| Gloss Finish |
|
| Soft Touch Lamination |
|
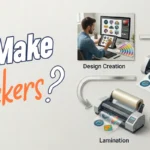
Step 3: Print the Stickers
Printing is one of the main steps of customization because it has a great impact on how the final sticker will turn out. There are multiple printing options that can be used by individuals as well as brands that give high-quality visual results.
Home Printing
There are options one can use for small-scale printing without compromising on the visual quality.
- Inkjet printers
- Laser printers
- Printable sticker paper
Professional Sticker Printing
Flexography is also a good choice for bulk orders need in comparatively less time. You can also go for digital printing if you want your small order sizes at the fastest turnaround rate.
- Better color accuracy
- Durable inks
- Waterproof printing
- Bulk production capabilities
Important Printing Factors
How to print custom stickers that are absolutely flawless? There are important factors that need to be consider before printing. These include:
- DPI resolution: Print at high resolution to maintain sharp details.
- Bleed margins: The artwork can be extend beyond the cut line to ensure clear results.
- Modes: Use CMYK for printing because it provides the most accurate print colors.
- Test prints: Always perform a prior trial before final production to identify issues beforehand.
Step 4: Cut the Stickers
The next step after the printing is cutting the stickers into their desired shape. This needs to be done carefully because it makes or breaks the entire look because an unskillfully cut sticker can leave a good impression on the viewer about the product.
Manual Cutting
Glitter Stickers and craft knives can be used but it must be ensured that neither the artwork is cut nor white margins appear at the edges.
Machine Cutting
Brands can use cutting machines for bulk orders to guarantee precision. Cricut and Silhouette Cameo are popular because of the professional quality results they give. These machines provide clean edges and accurate cuts for customized die-cut .
Types of Sticker Cuts
| Sticker Type | Description | Features |
| Die-Cut Stickers | The sticker and its backing are cut into the exact shape of the design. | Provides a clean and custom-shaped appearance. |
| Kiss-Cut Stickers | Only the sticker layer is cut while the backing paper remains intact. | Easier to peel and handle without damaging the design. |
| Sticker Sheets | Multiple stickers are arranged on a single sheet for convenience. | Easy organizing that allows multiple designs to be arrange together. |
Step 5: Apply Protective Coatings
Make your own stickers free of all kinds of scratches so that they can be used for a long time. You can apply coatings that keep the decals safe from damage of different kinds. They can also add finesse to the custom glossy stickers by protecting them from environmental damage. These options include:
- Lamination
- UV coating
- Anti-scratch coatings
- Aqueous coatings
Mistakes to Avoid
The entire sticker can go to waste if you make some of the most common mistakes. Thinking of what not to do, and how to make sticker free of all kinds of flaws. Make sure that you follow these guidelines:
- Using low-resolution artwork
- Choosing the wrong material
- Ignoring bleed areas
- Overcomplicated designs
- Poor cutting alignment
Conclusion
The detailed step-by-step guide for making the best custom stickers with undeniable allure. Each stage affects the final appearance and durability of the product. If you want to design personalized for your brand, CustomStickersPro is the largest wholesale supplier in the USA. We offer free assistance and a wide customization range to give you unlimited design options. Book your order with our company to get your own at discounted rates in bulk.